.png)
Bio Pages allow you to take your Link in Bio to the next level.
If you’re building your brand on LinkedIn, you likely want to direct your audience to another destination.
For example, to your website, newsletter, videos, or free resources.
One of the ways you can do this is by using the Link in Bio feature. Your audience visits your profile, clicks on your Link in Bio and visits a specific site.
The problem is you can only have one destination on your Link in Bio at a time. So, you'll be limited if you’re trying to promote multiple things.
Bio Pages make things easier.
They let you have one link that takes people to all the destinations you want them to visit online. That way, your audience can choose how to interact with you. And you can promote multiple things at once.
This article will teach you how to set up a Bio Page in less than 5 minutes.
What does a Bio Page look like?
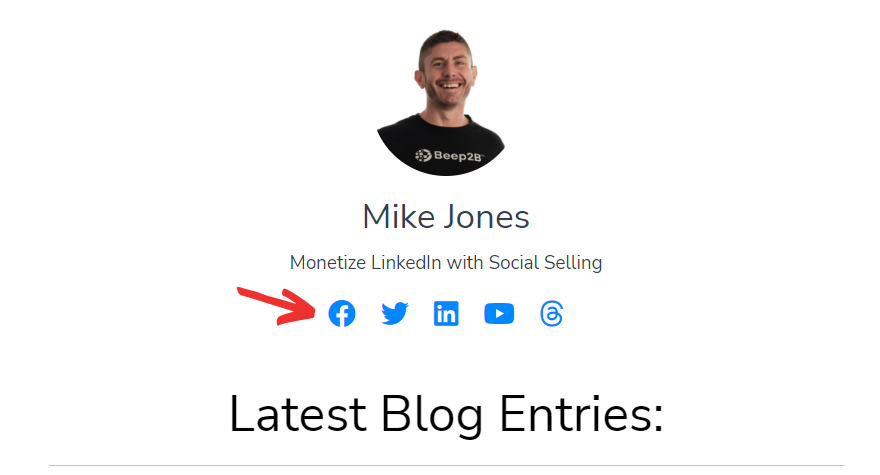
Here’s an example from Kat Norton, a popular creator on LinkedIn.
This is how her Link in Bio is set up:
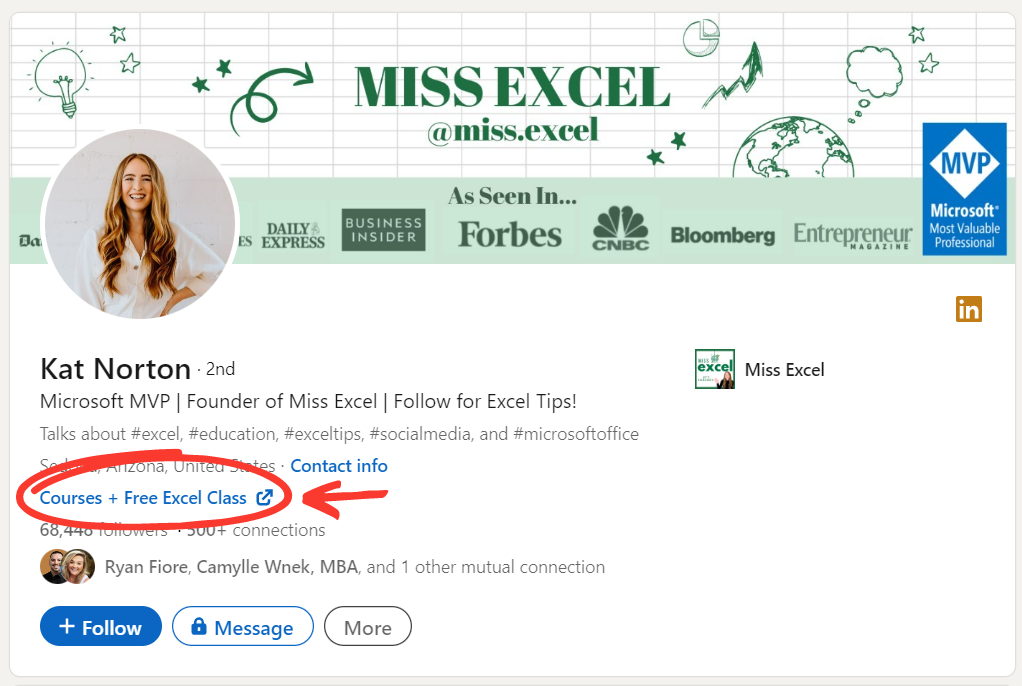
When you click on it, instead of going to a specific website, it takes you to her Bio Page, where she has 4 different links set up.
- One to all her courses
- One to her free webinar
- One for corporate discounts
- And one for her newsletter
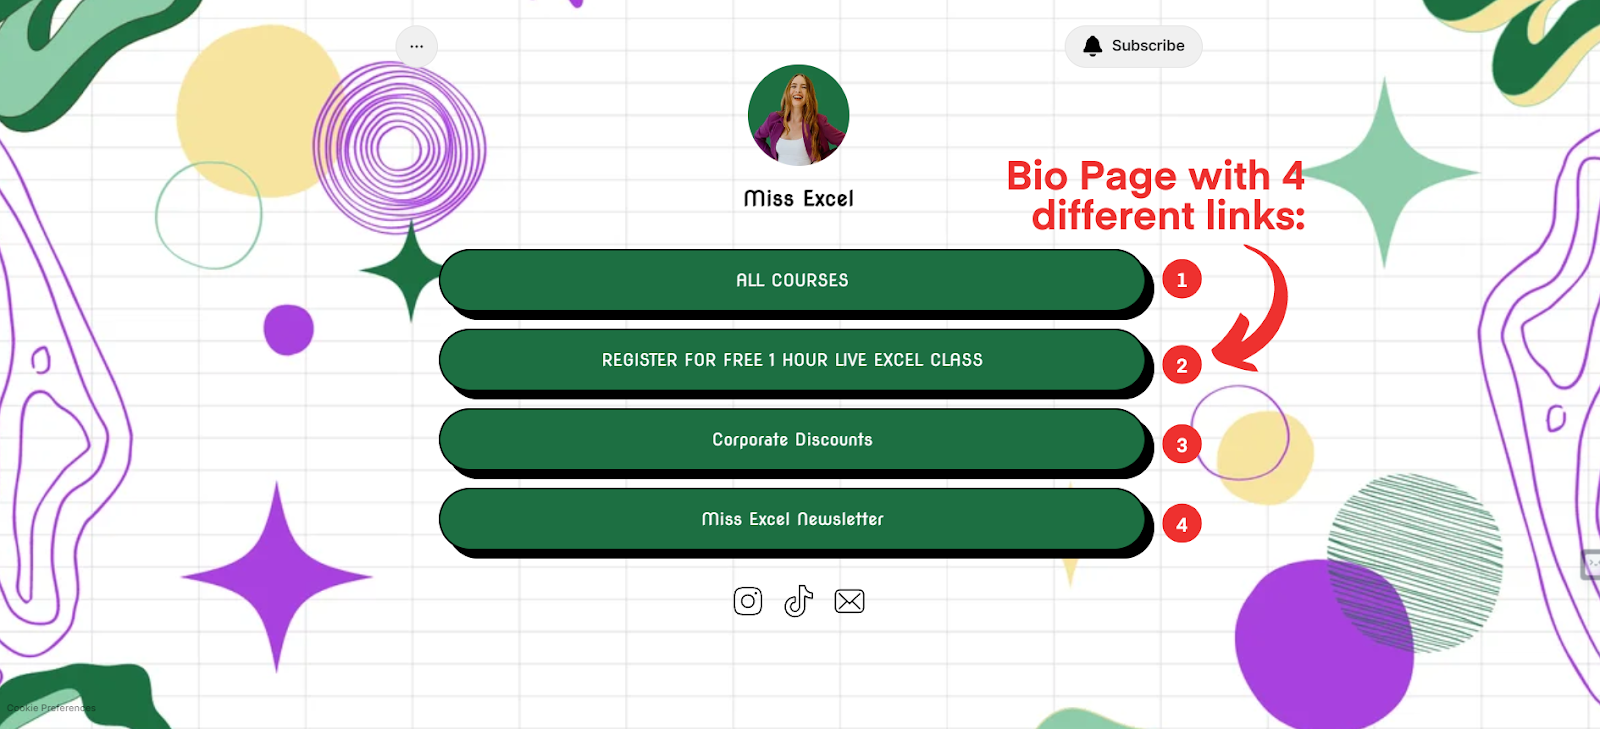
That means that one link in her LinkedIn profile is being “multiplied” into 4 different links in her Bio Page.
Her LinkedIn audience can now decide if they want to sign up for her newsletter, watch her webinar, or interact with her in their preferred way.
So, how can you copy this set-up for your LinkedIn marketing?
Let’s have a look.
1. Creating your Bio Page:
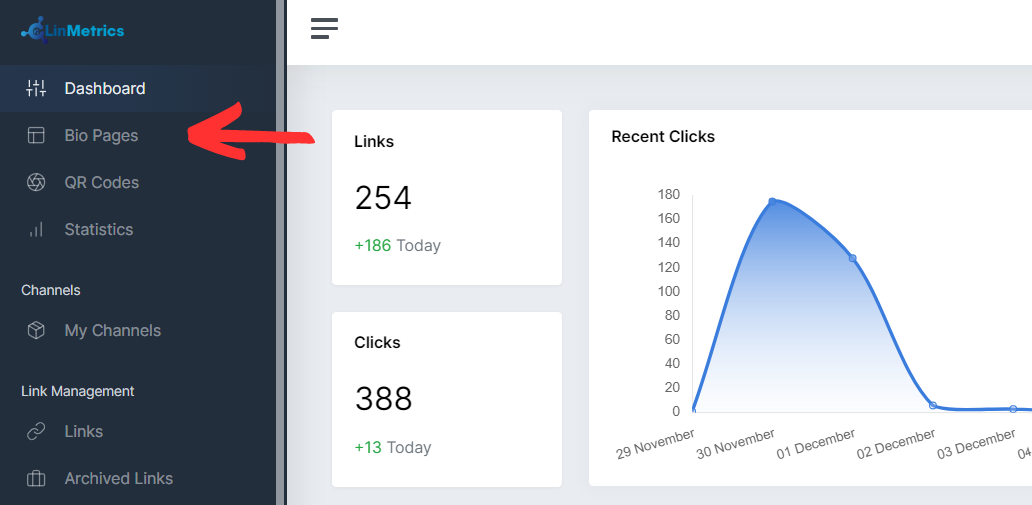
The first step is to log in to your LinMetrics account.
Once there, click on the ‘Bio Pages’ option that you’ll see on the left-hand menu:
Next, click on ‘Create Bio’.

You’ll be asked to enter your Bio Page’s name and alias. You can use your first and last name here.
Keep in mind that your alias will show up in the URL of your Bio Page. For example, if your domain is www.amazingwebsite.com, and your alias is “John Doe”, your Bio Page’s URL will be www.amazingwebsite.com/johndoe
You can always change that later on, so there's no need to overthink it.

Once that’s set, you’ll land on the Bio Page main dashboard, which has 5 different sections:
- Content section
- Social Links section
- Appearance section
- Settings section
- Data section

Let’s take a closer look at each one.
Content section:
Here is where you’ll add all of your Bio Page’s content. First, you can add your profile image and edit your name, domain and alias.
You’ll also see a preview of what your Bio Page looks like as you add more content to it.
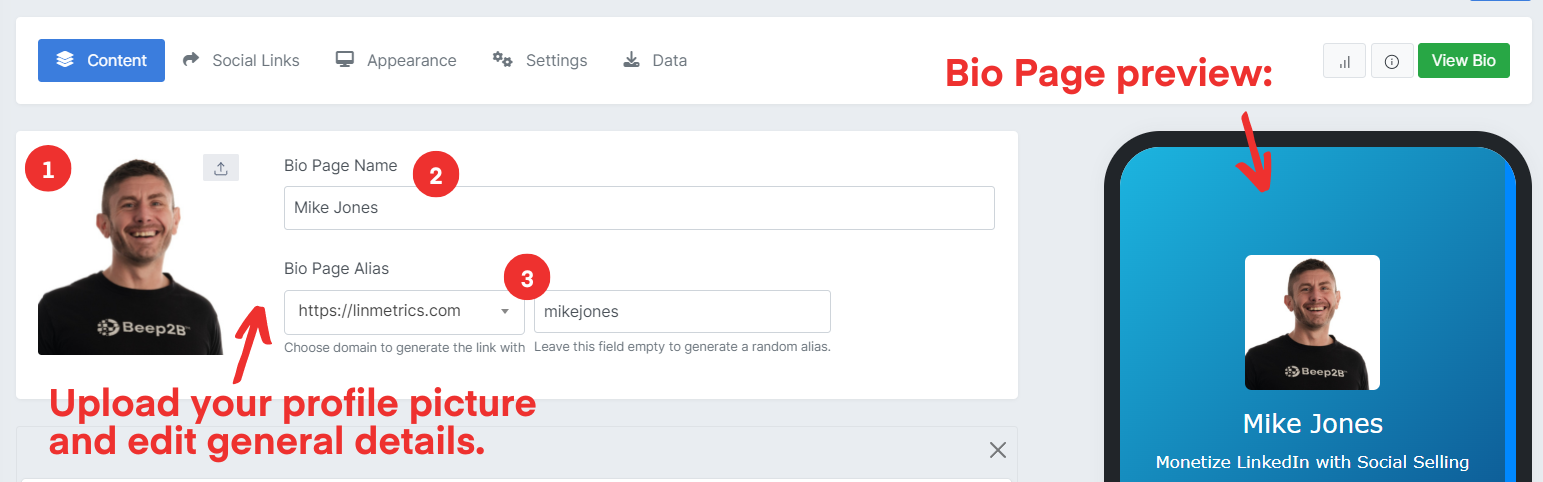
When it comes to adding your content, you’ll see a button that says ‘Add Link or Content’:
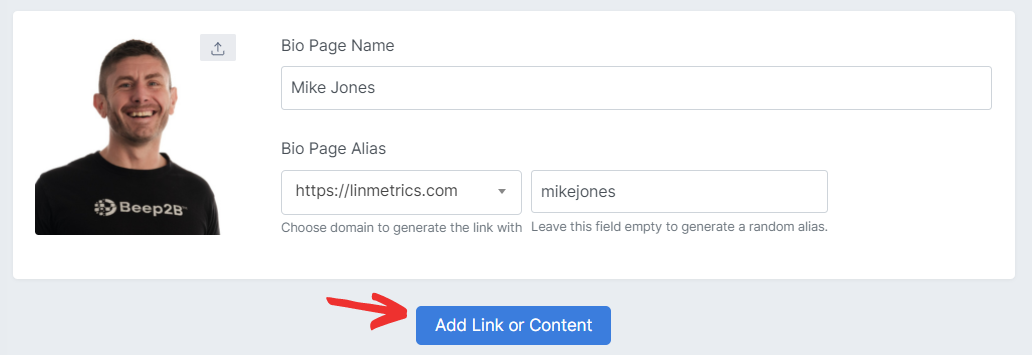
If you click on it, it will open a window with 32 different types of content you can add. All from images to WhatsApp buttons, newsletter forms, payment links, etc.
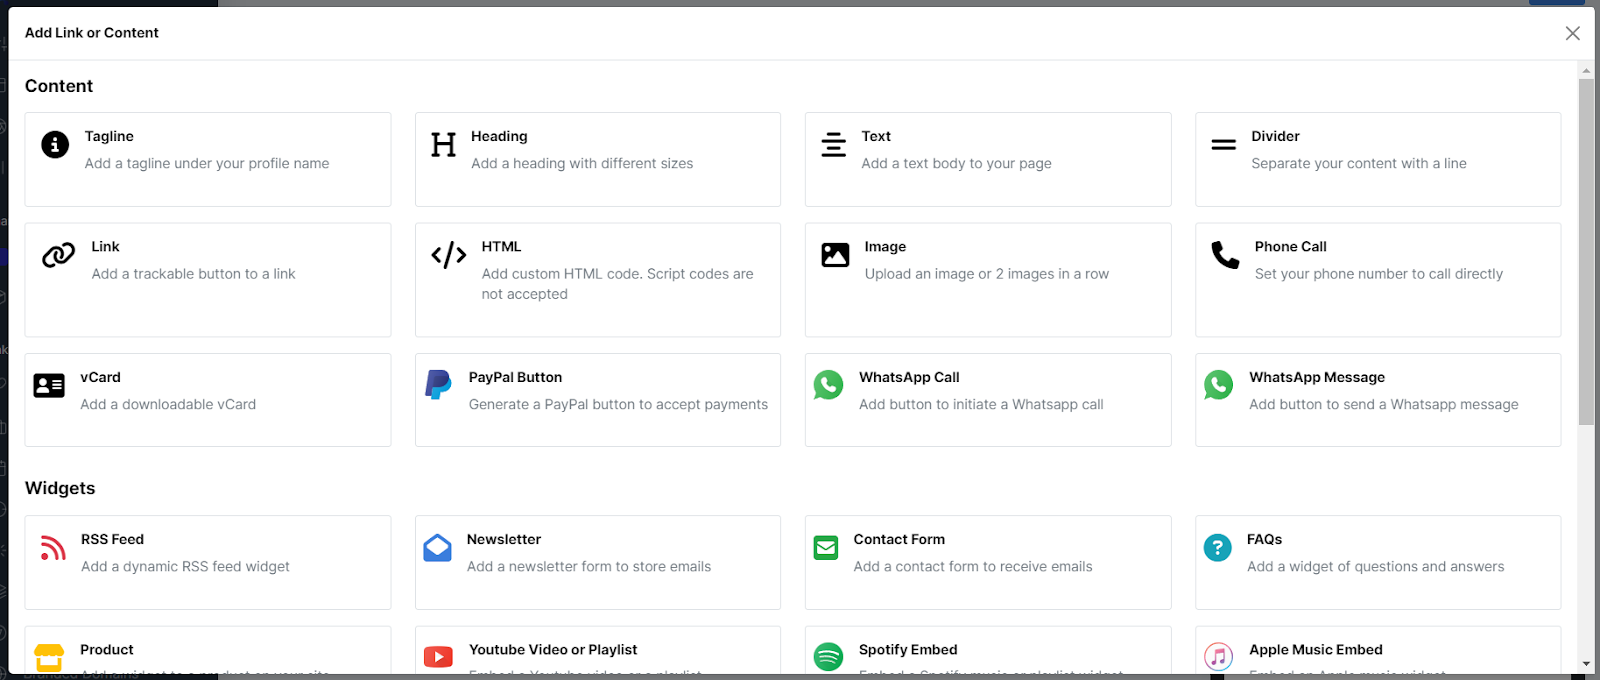
Here, it’s just a matter of selecting what you’d like to feature on your Bio Page. Feel free to add as many as you like, but remember that simple always works better when it comes to online content.
Example: How to add a Heading and a Clickable Image to your Bio Page:
First, click on ‘Image’. This will add the ‘Image’ content field to your Bio Page dashboard.
There, upload the image you want to show on your Bio Page and set the link that you want to send people to when they click on it.
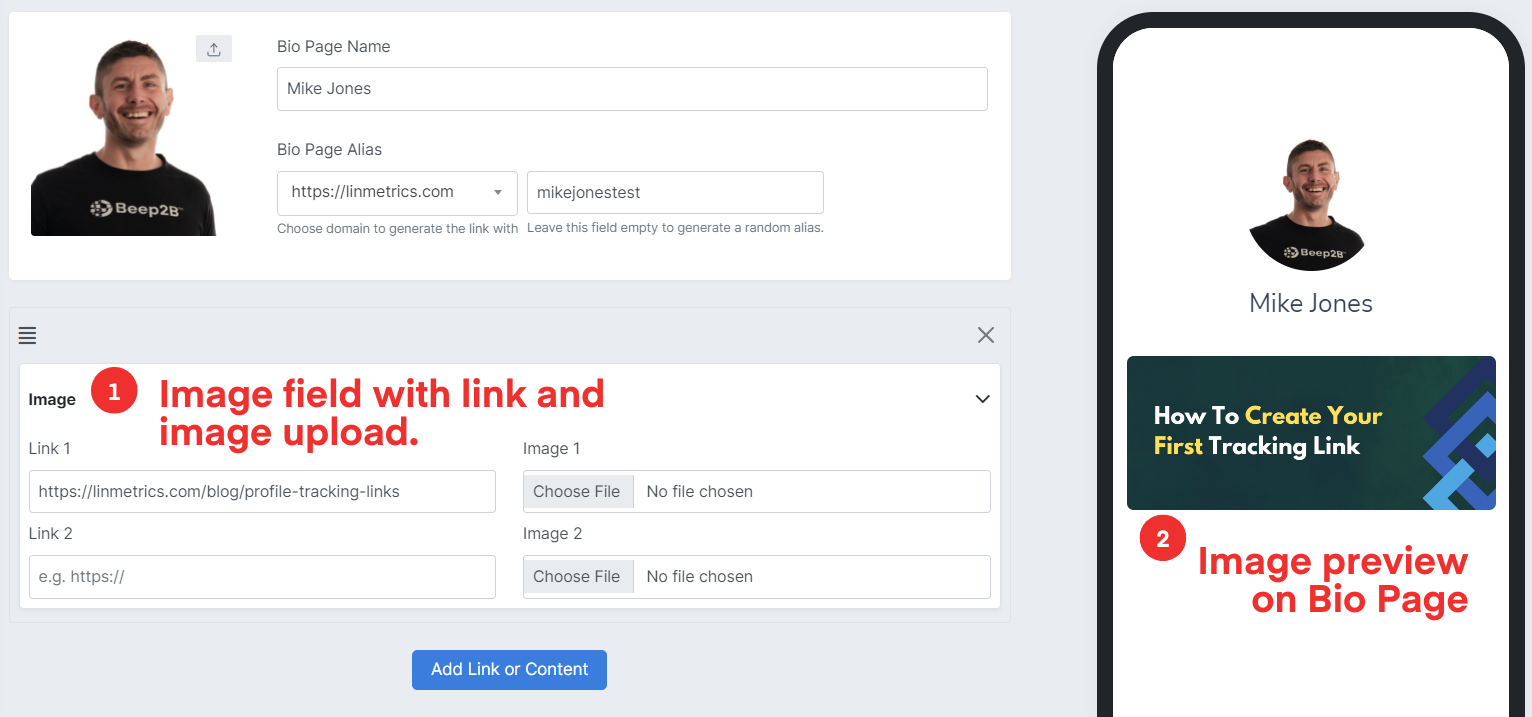
I’ve used one of my blog posts' thumbnails in the example above. That way, people will see and visit my LinkedIn How-To Guides when checking my Bio Page, which I’m trying to promote.
Next, we’re adding a Heading. So, click the ‘Add Link or Content’ button again and select the ‘Heading’ option.
This will add the ‘Heading’ content field to your dashboard.
There, add your Heading text and choose a different style and colour.
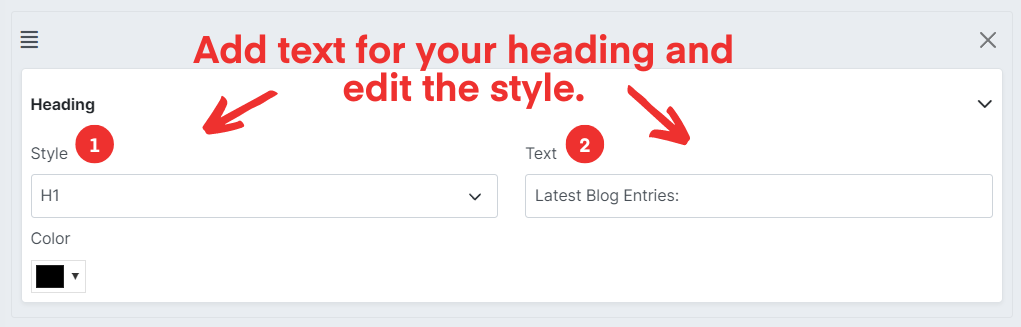
The text will now show up on your Bio Page’s preview:
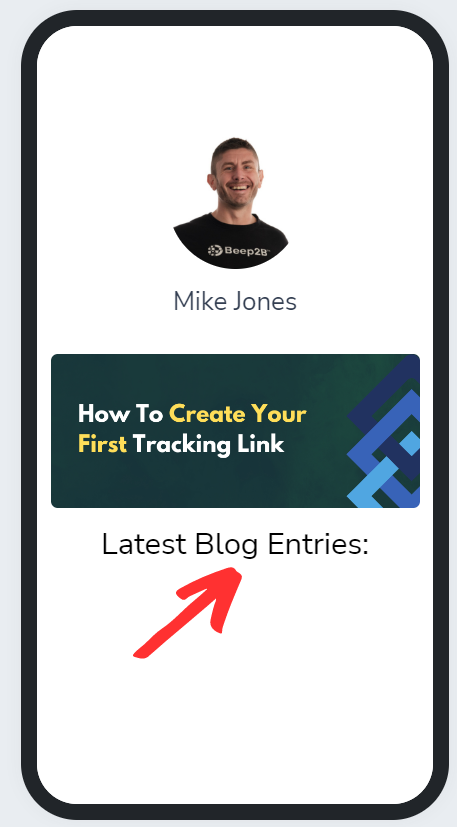
But that’s not showing in the correct order. I want the Heading above the image.
So, all I have to do is click on the hamburger button in the left corner of the heading section, and drag it until it’s above the image section.

After adding and organising your content, click the ‘Save’ button in the top right corner. You can also click the green ‘View Bio’ button to see the desktop version.
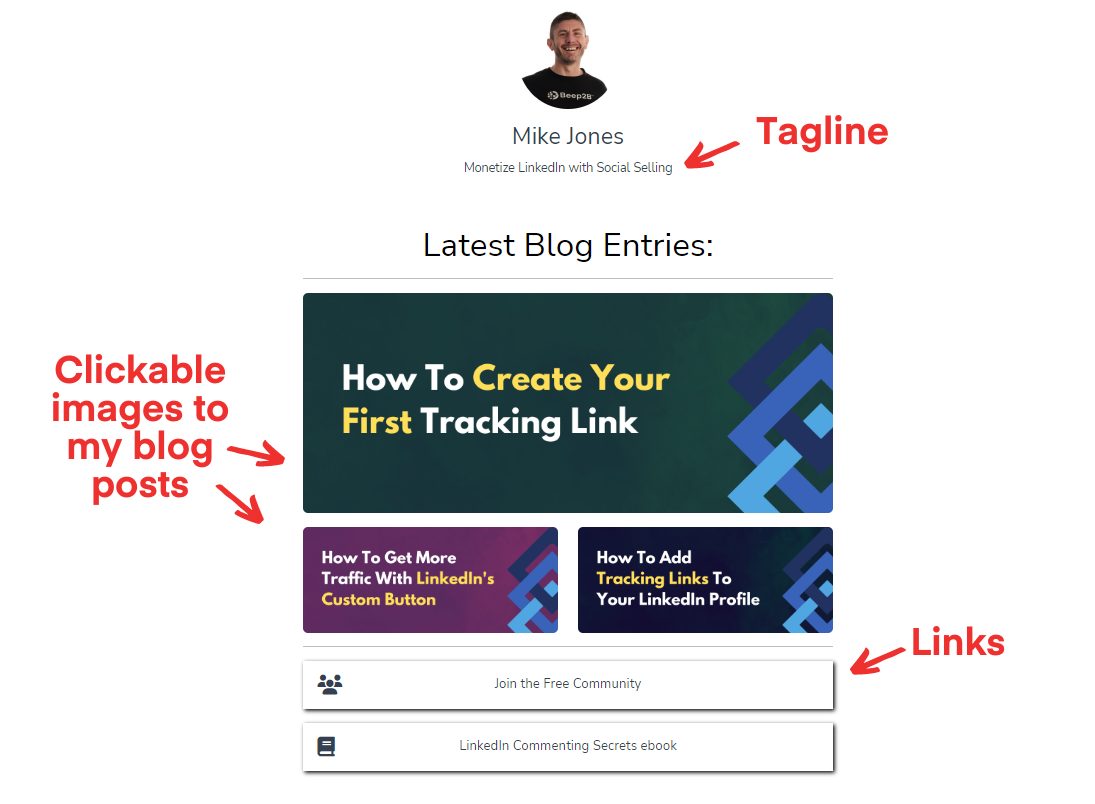
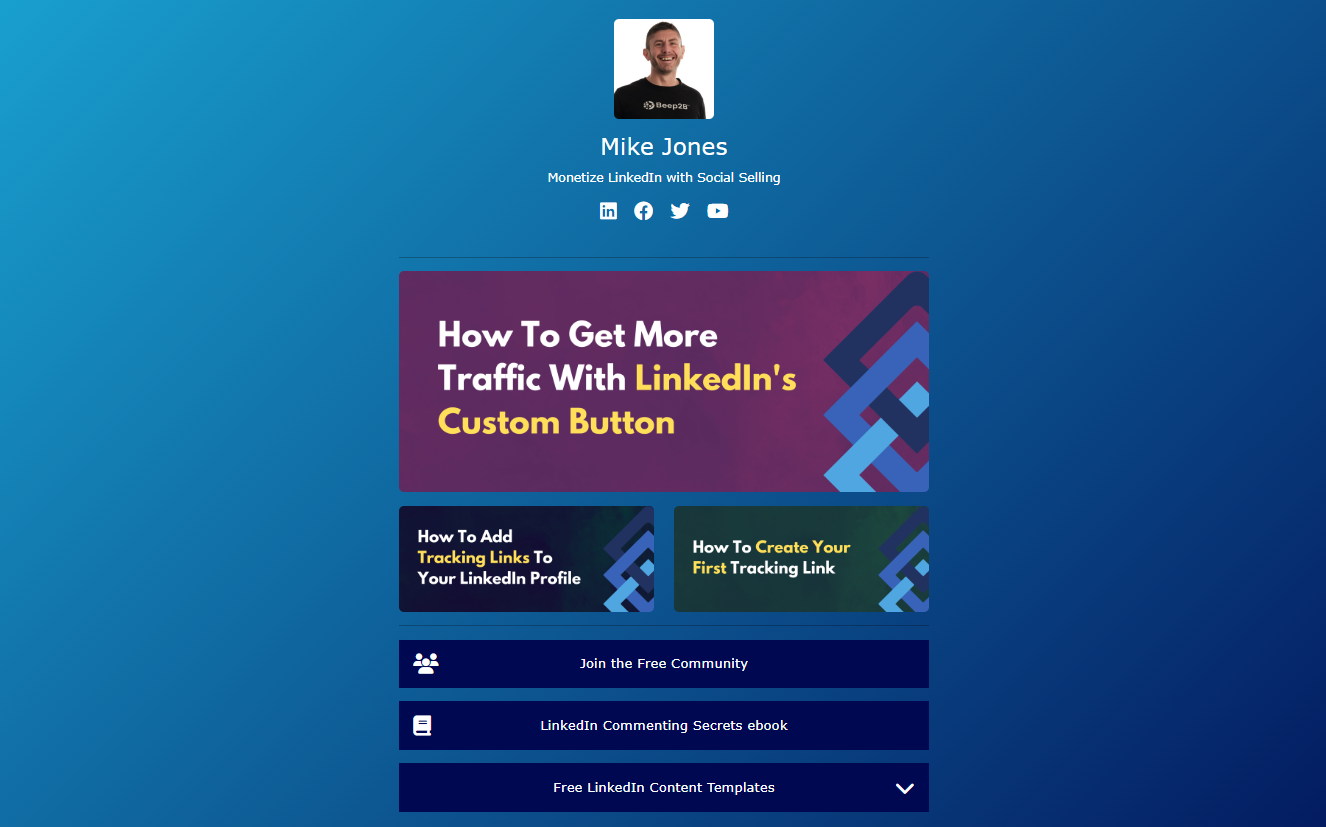
This is what mine looks like after a few tweaks:
Now, let’s look at the remaining sections in the Bio Pages dashboard.
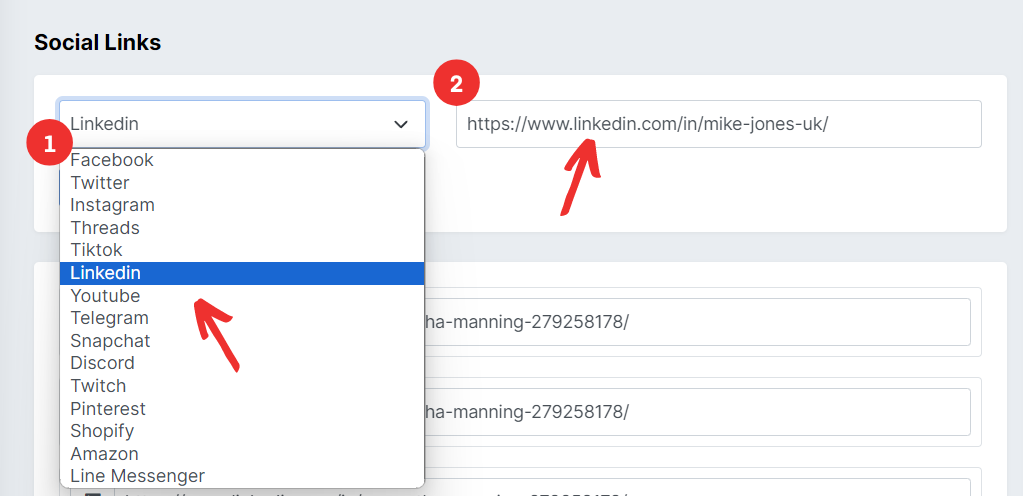
Social Links section:
This one is pretty straightforward. Here, you can set all your social media links and how they’ll appear on your Bio Page.
Select the social media platforms you want to feature and add the relevant URLs.
You can have them appear under your name and tagline or at the bottom of the Bio Page.
Appearance section:
As the name suggests, here you can change the appearance of your Bio Page.
You can choose a different layout, theme, and font and customise the background and colours.
After adjusting mine, this is what it looks like:
Settings section:
In this section, you can define advanced settings for your Bio Page. For example:
- SEO settings
- Removing your profile picture
- Removing the LinMetrics branding
- Adding ad platform pixels for retargeting
None of this is required to set up your Bio Page, but it can be helpful depending on your goal.
Data section:
Last, the data section lets you download any data visitors may leave on your Bio Page.
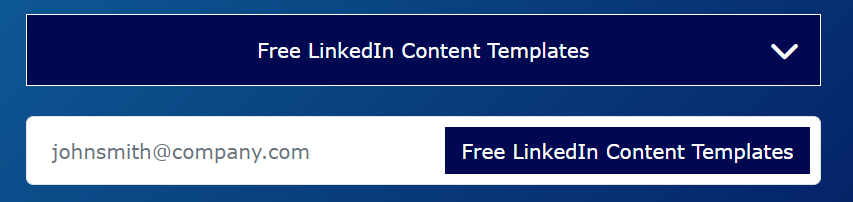
For example, if you add an email form to your Bio Page, visitors can enter their email address to access a specific resource or subscribe to your newsletter.
The forms of data you can download are:
- Email subscribers
- Contact forms
Now that you know how to set up your Bio Page, let’s look at how to use it on LinkedIn.
2. Adding your Bio Page to LinkedIn:
To add your Bio Page to LinkedIn, you must turn Creator Mode on. This will give you access to the Link in Bio feature.
Simply go to your profile and scroll down to the 'Resources' section:
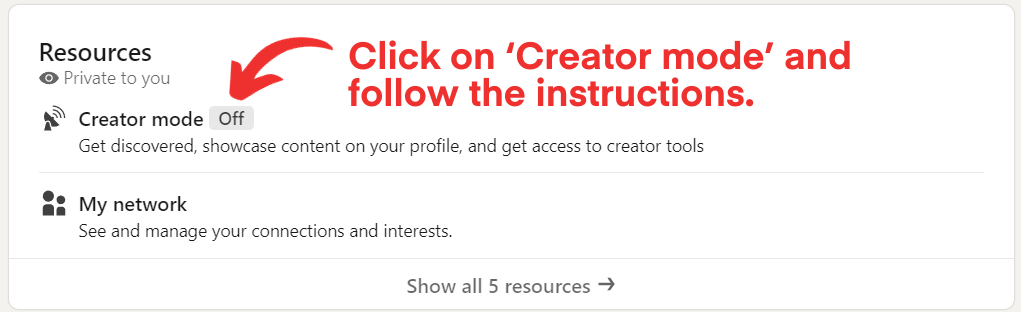
Next, click 'Creator mode' and follow the instructions in the pop-up window.
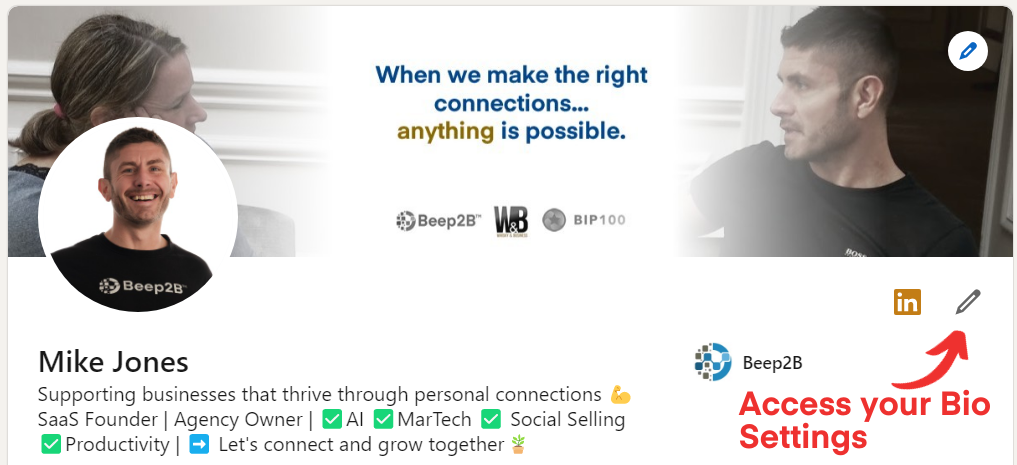
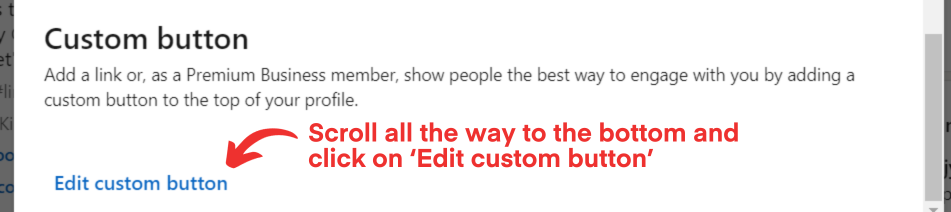
Once Creator Mode is enabled, you can add your Link in Bio. Right underneath your profile banner, you will see a pen icon. Click on it and scroll down on the pop-up window until you see the 'Custom button' section:
Once you're there, you want to click on 'Edit custom button'.
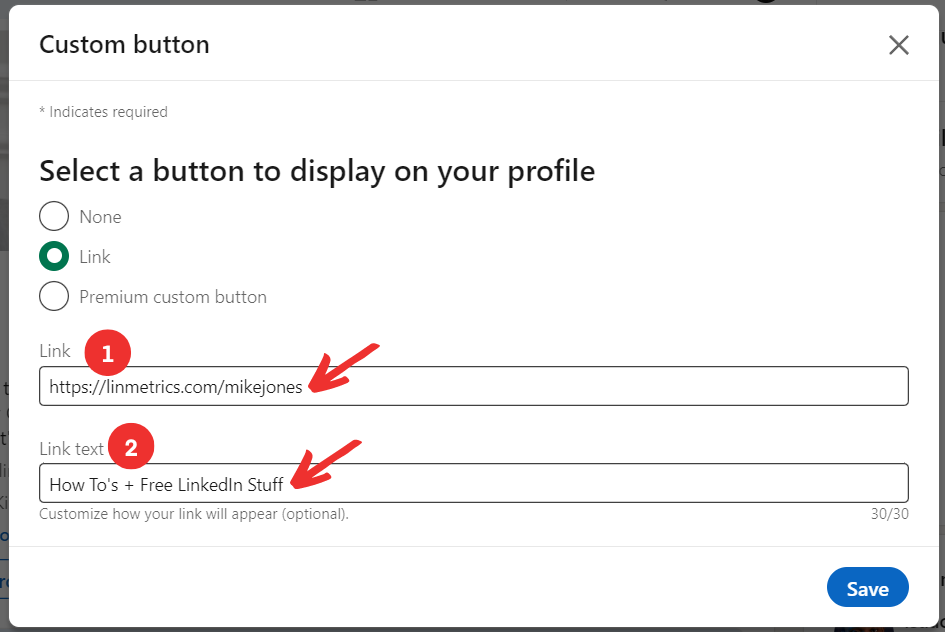
Then, choose the 'Link' option and fill out the 'Link' and 'Link Text' fields. The 'Link' field is where your Bio Page link goes, and the 'Link Text' field is the text that will be shown on your profile.
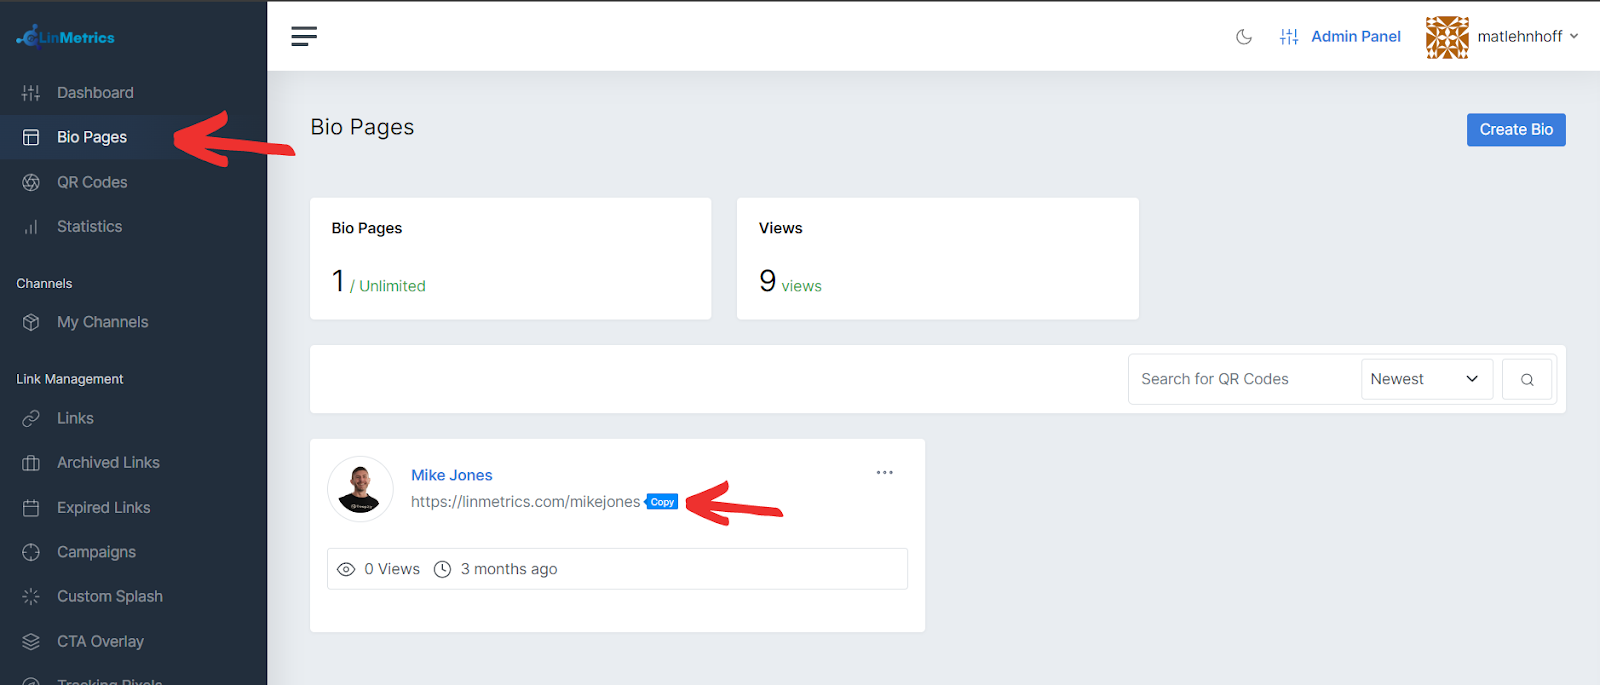
If you don’t know where to find your Bio Page link, all you have to do is click on Bio Pages in the LinMetrics left-hand menu and then copy the URL of the relevant Bio Page.
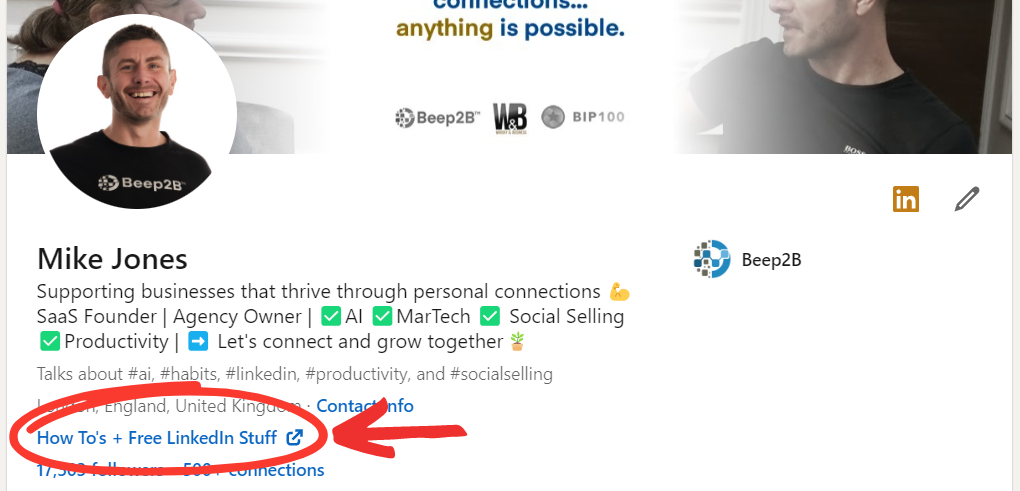
Once you’ve pasted your Bio Page link on LinkedIn, it will create a clickable link that will show up below your location on your profile.
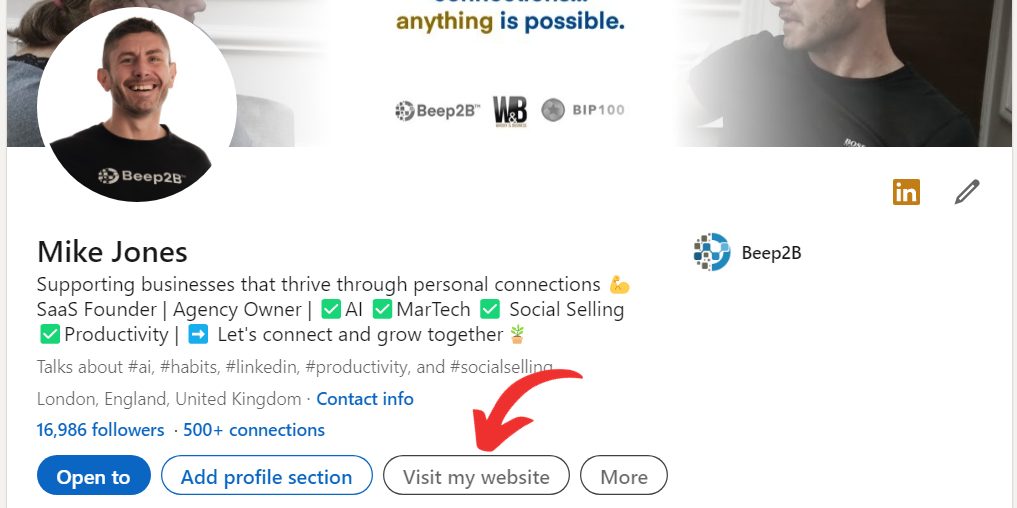
Alternatively, you can also set up your link as a Custom Button. It's a similar process as with the Link In Bio setup, but you'll have a button on your profile instead. See below:
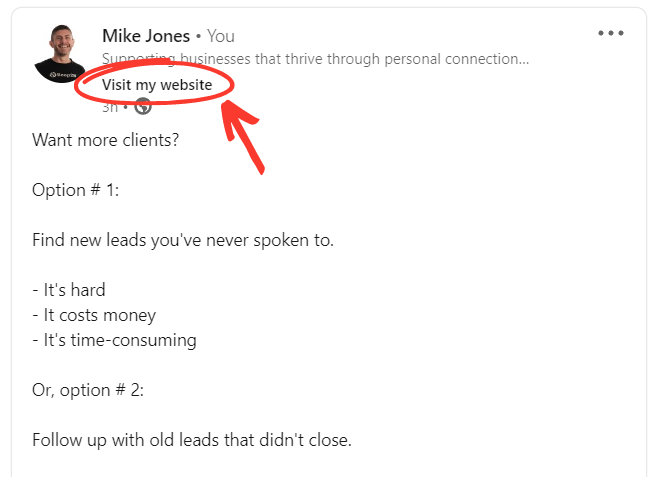
The Custom Button has a massive advantage:
It will also show on your content, not just your profile. This will help you increase awareness of your Bio Page every time you post.
And that’s how you combine Bio Pages with your Link in Bio on LinkedIn.
Now, every time your audience visits your profile or sees one of your posts, they’ll be able to access all of your most relevant online resources.
If you haven’t yet signed up for LinMetrics, you can get unlimited access for only £6/month. Or, sign up with a single one-time payment of £69 for lifetime access.
Sign up today by clicking here.
.png)
.png)